Wednesday, April 30, 2014

Book Review: The Iron Jackal

The Iron Jackal by Chris Wooding

(I was provided a copy of this book in exchange for an honest review.)

This book is actually the third in the series called "The Tales of the Ketty Jay."  I haven't read the first two and although I knew there was some sort of prequel, I didn't realize this was the third book.  For the most part I was able to read this as a stand alone novel without any problems.  However, I do wonder if a lot of my confusion about the setting, at least at the beginning of the book was due to not having read the previous entries.

The Iron Jackal is part of a growing subgenre of steampunk stories: airship pirate stories.  The action follows the crew of the ship The Ketty Jay and their various adventures.   And action is certainly the right word.  The book mostly consists of one large action set-piece after another, with lots of shooting, running, flying, and some more shooting.  This book isn't at all afraid of violence and having its heroes kill people.

In fact, I have to say that the high body count and cavalier attitude to slaughter turned me off a bit at first.  The book opens with a fairly lengthy section about a train heist.  The heist is taking place in the fictional country of Samarla, which has a fairly complicated social structure that took me a while to understand.  The country seems to be modeled somewhat on India, with three different nationalities: the Samarlans, Daks, and Murthians.  To the best of my understanding the Samarlans (the villains of the piece) are dark skinned, while the two races they enslave are lighter skinned.  So there's quite a lot of time spent with our light-skinned European-analogue heroes killing lots of evil dark-skinned people.

It was enough to make me give the book quite the side-eye.  I'm not sure why you would set your story up that way, especially having the dark-skinned people be slavers of lighter skinned (not sure exactly what that means, but blond hair was mentioned) people who ultimately the heroes end up rescuing.  One of the advantages of setting steampunk stories in a fantasy universe would be avoiding the colonialist heritage of our own history.  So I'm not sure why you'd set things up to be, well, problematic in an entirely new way.

So, if you can get past that issue, (which continued to crop up and nag at me throughout the book) you may find this book quite enjoyable.  Particularly if you enjoy lots of action in your narratives.  The action is well-written and mostly well-paced although I felt some sequences, especially the opening heist took too long.  The overall plot is very strong, but suffers from the novel taking nearly 100 pages to actually get to the main plot, and other delays along the way.  The novel is quite long for an adventure novel, the trade paperback clocking in at 479 pages.

One of the strengths of the book is definitely its characters.  The Ketty Jay has quite a lot of crew members, and they all (or maybe most) have detailed and divergent backstories.  At first I felt like I didn't quite have a handle on the characters, since so much early on focused on action.  But by the end I was getting attached to them and several of them were nicely fleshed out and developed over the course of the story.

As for the world itself, I do miss the Victorian parts of steampunk in the world of the Ketty Jay.  This book is much closer to the TV show Firefly than anything Victorian.  There are airships and weird tech, but most of the tech is based on a supernatural force called daemonism rather than steam or real-world technology.  So it's a world that would sit better with the post-apocalyptic crowd than the neo-Victorian.  And that's fine if that's your thing, but I find myself missing the fancy side of things.

Basically I think that I'm not the ideal audience for this novel, being that action in books isn't one of my favorite things, and that I prefer my steampunk to have strong Victorian elements one way or another.  But it is well written and ultimately rewarding.

Monday, April 28, 2014

Femme Steampunk Darkwing Duck: Coat and Cape Mock-ups

So I've been very busy working on this costume.  As a reminder, you can see my previous posts on the subject here.

I've has a good idea of what I wanted for the coat for a while.  I wanted something vaguely similar to the Simplicity 2172 coat, with the underbust closure, but I wanted something more menswear styled with a double-breasted vest look.

So I did actually start with the 2172 pattern, leaving off the front pieces, and shortening it all around.  I added the double-breasted vest front.  I also added a lot more curve to the pattern because I am wearing it over a very curvy corset, after all.  I wasn't sure exactly what I wanted to do for the collar/top.  I am going to have a cravat with this outfit, so I felt like I needed something to hold the cravat in place.  I decided to try making the top meet above the bust.  I also changed the sleeves, adding more Victorian puffed sleeves.

My original mock--up was made from flowered sheets and I put this together by just basting bits and pieces of fabric together until I got something I thought might be workable.  I don't have pictures of it because it's SO ugly and it's now in pieces anyway.

The complete wearable mock-up.
I decided to make a wearable mock-up to test my new pattern.  I made it with some sheets I had lying around, but which would be actually wearable.  I also decided to test a somewhat unorthodox construction method I took from this article in Threads Magazine.  It was similar to the folded seam method I use to make corsets and I thought, "Hey, this will be a fast way to sew the outer fabric and lining at the same time!

Yeah, not so much.  I included topstitching, per the article, which means I sewed 3 lines of stitching for every seam, versus the two I would have if I'd sewn the lining and fabric seperately.  Plus the article makes no mention of how to finish the edges.  So instead of just stitching the two layers together around the edge and flipping it, I had to painstakingly hem all the edges.  It did NOT save time.
 
But ok, that's what experiments are for.  I learned what NOT to do.  I also learned that I need to interface the vest portion (DUH).  There are some changes that need to be made to the fit as well.  The shoulders are too tight for me to actually move in, and the band across the chest is too high and presses into my throat.

I'm also planning to add cuffs and collar to the final coat.  In truth the final coat is almost entirely constructed, but I'm on hold a bit until I decide exactly what I want the length to be.  The issue has to do with the cape.

Cape

I thought the cape would be the easiest part of the costume.  Make a cape...end of story.  Yeah, until I started looking into different ways to make a cape.  Half-circle, full-circle, triangles, trapezoids, shaped shoulders....

Since I dislike reinventing the wheel I decided to try out the free pattern from Fleece Fun for a Red Riding Hood Cape.  I liked the shoulder shaping on the pattern.  I printed the pattern and added 14" to make it longer.  This is what I got when I made it from from ugly garage sale sheets.


So there's actually a HUGE amount of fabric in this cape.  The pattern pieces are so wide at this point, that I can't make them any wider and still get them cut from my fabric.  I really like the fullness of this cape, but is it too short?  It's difficult to judge.  I don't want a full-length cape, but does it look silly to have a cape shorter than my coat?  The original Darkwing Duck cape is very billowy and distinctive, but I don't want something too big to handle and pose with for photos.  This cape feels very good, but does it look wrong?


So I appreciate thoughts on this.  

Friday, April 25, 2014

I've discovered a few interesting things recently which don't fall into set categories, so time for a bit of a random Friday Finds.

Evermore Park - So this is a group planning to open a "Victorian Era Fantasy Adventure Park" in Pleasant Grove, Utah.  Their plan is really interesting and extremely ambitious.  It sounds fantastic, if they can actually pull it off.  The only thing that I think is very strange is that they say costumes will be encouraged only at special events.  It seems to me that if you're going to have this sort of thing, you want to encourage costumes by your attendees.  That's half the fun of any Renaissance Faire and a lot of the sales and commerce.  How much would it suck as a steampunk to attend a "Victorian Era Fantasy Park" and not get to dress up?  They also seem to be avidly avoiding the word steampunk, which is also a little strange.  There's an interview with them here.


I've mentioned more than once that Cherie Priest's novel Boneshaker, first in the Clockwork Century series, is probably my favorite steampunk book ever.  Well it's very soon going to be released as a fully dramatized and voiced audiobook/play/whathaveyou by GraphicAudio. You can bet I've already ordered my copy.


Laura at Laura After Midnight has released a new corset pattern and is celebrating with a month long sew-a-long on her blog.  Check out a month of tutorials on corset making! Corset Month


Finally, I got my copy of Steampunk for Simpletons in the mail and it's very nice.  There are some very nice tutorials in addition to the awesome educational information about steampunk as a subculture and a community which I reviewed earlier.  So if you haven't ordered a copy yet, you totally should.


Don't forget to enter to win a $50 giftcard in my Facebook Giveaway!

Wednesday, April 23, 2014

Like and Win a $50 Steam Ingenious Giftcard!

I'm hosting a giveaway on my Facebook page for a $50 giftcard good at my Etsy shop or towards any custom order.

If you're not already following my Facebook page, please stop by and Like us, and like the following post to enter the contest!


Follow my blog with Bloglovin

Monday, April 21, 2014

Tool Review: Seam Allowance Guide

Hey, did you know it's really hard to cut and take a photo at the same time?
Seam Allowance Guide 

I recently discovered this neat sewing tool thanks to Pinterest.  It's a little plastic cylinder that attaches to your scissors with a magnet and measures your seam allowance so you don't have to add seam allowance to your patterns or measure and mark them on your fabric.  I ordered a pair immediately and I've now had a chance to test them out. (They come in a set of two: one for scissors with a flat blade and one for slant-bladed scissors.)

First, why is this tool needed?  Well if you only sew from commercial patterns and don't draft your own, or use patterns without seam allowance, you probably don't have much use for this.  But I find myself working more and more on patterns without seam allowance.  Modifying patterns is much more accurate if done without seam allowance.  Especially with corset patterns, it's important to finalize your pattern without SA for accuracy.

But then you have the problem of how to add SA back when you are cutting.  You can copy your pattern to another paper and add SA in on the paper, but then you have two copies of the same pattern, and it's very time consuming.  With corset patterns especially, I like to mark the stitching line for accuracy, so I trace around the pattern with chalk and then add SA on the fabric.  I've tried a few different ways of marking out the SA and none of them have been ideal.  So this sounded perfect to me.  No measuring or marking necessary!

So I tried it out on the jacket pattern I developed for my Femme Steampunk Darkwing Duck costume.  Because I created the pattern by draping and inventing and adjusting, I had my final pattern pieces with no SA.  I'm not overly concerned about exact stitching lines, so I just pinned my pattern to the fabric and used the Guide to cut the seam allowance.

The guide has two rubber rings that you can move to mark different thicknesses of SA.  I used 5/8" here.  You place the guide on the blade of your scissors and cut by keeping the correct ring along the line of your pattern piece.  It takes a little practice to keep your cutting accurate, since there's nothing keeping you from wobbling all over the place.  You also have to cut with your scissors on the left side of the pattern piece because the guide has to be on the blade above the fabric.

Overall, I'm happy with this, and it saved me a lot of time on this project with HUGE pattern pieces that would have taken forever to mark out the SA on.  My only real complaint is that I wish the magnet was a bit stronger because it is possible for the guide to slip up the blade as you cut, which leads to less accuracy in cutting.
My finished pattern piece.

The Seam Allowance Guide can be ordered from the maker here.  It's $15 for the pair, including shipping from Australia.  It arrived pretty quickly for me, in about a week.

Friday, April 18, 2014

Friday Finds: Steampunk Skirt Inspiration

I was talking to a friend about options for an outfit she's planning and decided I'd take the opportunity to collect a bunch of examples of different steampunk skirt styles in one place.

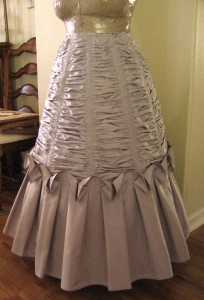
From Historical Sewing.com

This is an elaborately ruched skirt, for those with lots of fabric and time.  I love the effect, though.


Long skirt with one large ruffle.  I like this look because it can be dressed down or up and is relatively simple to make.  This image from the Simplicity 2207 pattern.


Long Skirt with pleated ruffle.  This is obviously the 2172 skirt.  Another nice option, although you'll spend a long time making all those knife pleats.


From Recollections.

Then there's just the plain, full skirt.  This one has some nice buttons on it.  The plain skirt is often seen under a bustled overskirt or over a hoop skirt.


From Dress Like A Pirate

Then there's the multi-tiered ruffle skirt.  Another incredibly versitile wardrobe piece, this photo shows how you can use one ruffled skirt pulled up in the back as a bustle.  Of course you can also pull it up in the front, which is always popular.


Monday, April 14, 2014

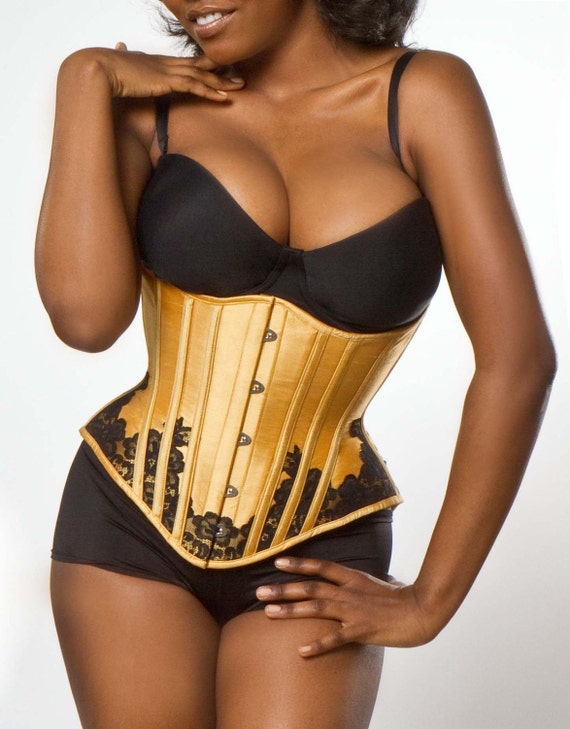
Corset Patterns List

Update: I fixed some of the links which were broken, and added a couple of new patterns.  Also I should note that while any of these may be useful to use as a starting point, most of the directions, especially from the mainstream pattern companies should be disregarded.  Use quality materials and your favorite corset construction method or follow a trusted online tutorial.

(Originally posted Nov 2011)
Right, let's get the corset patterns post out of the way. There are lots of sources for corset patterns, and the mainstream pattern companies may not be your best choice. Because they don't specialize in corsets, it seems they treat their corset patterns the same way they do all their patterns. The problem with this is that it means their corset patterns tend to run HUGE. So, if you're going to a pattern from one of the Big Four, go down a couple sizes first, and don't forget to make a mock-up first.

Laughing Moon 100: The Dore straight seam and the Silverado bust gore corsets - The Laughing Moon 100 pattern is probably the most popular corset pattern. It was my first pattern, and still the one I have used most. It's appealing first of all because for one price you get two different corset patterns, plus chemise and drawers. These are both mid-bust Victorian corsets. The Dore is a good first corset, while I would recommend the Silverado only to someone who has made a few corsets. (I probably won't make it again because I found it to be a bit of a pain in the ass.) The pattern comes with full instructions, but you may (probably will) need to seek extra help to understand them fully. Also, there is no waistline marked on the pattern, which is annoying.

Laughing Moon also makes an Underbust corset pattern. It includes a women's underbust, man's corset, and ribbon corset. I have no experience with this pattern, although I kinda like the shape of the underbust.

Truly Victorian 110 - This is a very attractive standard all-purpose Victorian corset. I've been told it is a better and easier to follow pattern than the LM Dore, but I haven't made it myself. If I didn't already have a pattern that fits me great that I modded from the LM Dore, I would buy this one. I have had very good experiences with Truly Victorian patterns.

King and Company Celine Underbust
Truly Victorian 1903 Edwardian Corset - Edwardian corsets are very different from Victorian corsets. They have a very straight front and very curved back and make you look "pigeon-breasted." It's not a style I really like, but some love it. This is a very new pattern, but if you want to try an Edwardian corset, it's probably a good bet.

King and Company Celine Underbust - This is a small indie company and this is their only pattern so far, but it's been very popular since its introduction. I've used it for my only underbust. The pattern is very well drafted. There are no instructions included, as it assumes you know your preferred method. Also you have to add your own seam allowance as how much allowance you need depends on your method.

Simplicity 9769 - This corset has a nice shape and I've seen some nice corsets made from it. But it's known to run very large and to require quite a bit of modification to get sized correctly. I was going to use it for my first corset and decided to go with the Laughing Moon 100 instead. Also keep in mind since this is a Civil War corset it is a midbust and will not give you adequate boob coverage unless you modify it. (This is true of pretty much all historical corset patterns. They were underwear, worn with a chemise.)

Simplicity 2890 -I'm honestly not sure what kind of corset this is supposed to be. I guess it's Victorian? Mostly, it looks uncomfortable to me. (All I can say is that corset DOES NOT fit that model.) I suspect, based on what I know of their other patterns, that this MIGHT eventually yield a decent corset, but it would require a lot of messing with first. CORRECTION: I've looked around and I quite like some corsets made from this pattern. The technique is advanced and different, as it has you insert bust and hip gores by slashing through pattern pieces. Anyway, I may actually try this one day, as it's a style of corset I like.

Simplicity 5006 - This is really a pattern for a bustier as written. But so long as you use proper corset techniques, it can be a nice overbust corset. I might even try it.

Butterick 5662
Butterick 5662 - This is a modern corset, with optional straps and pockets. I really like the style of this one, and I'm going to mess with it to see if I want to use it for my next corset project. I like that it's an actual overbust that has good coverage and a nice shape to the top. This is a very new pattern, so I've never seen one made before.

Butterick 4254 - 18th Century stays and corsets. I THINK this is intended to be a pattern with 18th century style stays and 19th century style corset. If it's the stays you want, this is probably an ok pattern but nothing I've seen convinces me the corset pattern is worth anything. It just seems to be proportioned all wrong.

Vogue 2810 - This is a modern corset pattern, and I kinda like the shape. It's a nice option if you're looking for something for formal wear. Not sure how easy the pattern is to get it to fit right.
Butterick 5935 - This is an interesting modern take on a 18th century or earlier style of corset.  I quite like the look, although it's not Victorian.

King and Company Josephine Waspie - This company's second pattern is for a short, closed front waspie.  To me it doesn't look very curvy, but they say it's beginner friendly, so you might check it out.

There are other sources of patterns of varying quality. Many are taken from historical sources such as patterns straight from period magazines, or made from actual corsets. These are usually pretty difficult to work with as they may lack instructions, only come in one size, or may use older sewing techniques. But they also can look really cool. I have yet to venture into these frightening waters. (Update: I am not so much afraid anymore, as much I don't have much info about how good these patterns are. But there are some neat ones out there.)  Some sources are Ageless Patterns, Past Patterns, Mantua Maker, Atelier Sylphe and Harlots and Angels and Ralph Pink Patterns.

Ok, and I think that's all I have to say about corset patterns. I've learned just from writing this. And I have at least 4 patterns I want to try RIGHT NOW. *sigh*

Friday, April 11, 2014

Friday Finds: New(ish) Sewing Patterns for Steampunk

McCall's released a new pattern today and there are some I haven't yet posted to the blog, so here we go.


McCall 6975 -Spats, Fingerless Gloves, Hats, and Belts  -This is the brand new release, obviously aimed at the steampunk market.  There's nothing wrong with any of the pieces, per say, but this seems like a weak offering.  The spats are nice for low rise spats, the gloves are ok.  The belts and the hats have a fine style, but I know the construction instructions on them are going to be really shoddy, since it seems the only stiffening in them is felt.  This might be worth picking up on sale, but there are much better hat and spats patterns out there.  (Psst, like my spats pattern maybe.)


McCall 6911  -This, on the other hand, is a welcome addition to the steampunk patterns available.  Pretty much everything about it is totally cute.  The bolero is simple, but has some nice touches.  The base skirt is a nice, long full trained Victorian skirt with lovely optional trim pattern.  And the bustle skirt is really nice as well.  The corset pattern might be ok, provided you make it as an actual corset with real boning.  Otherwise it's not going to give you much support.


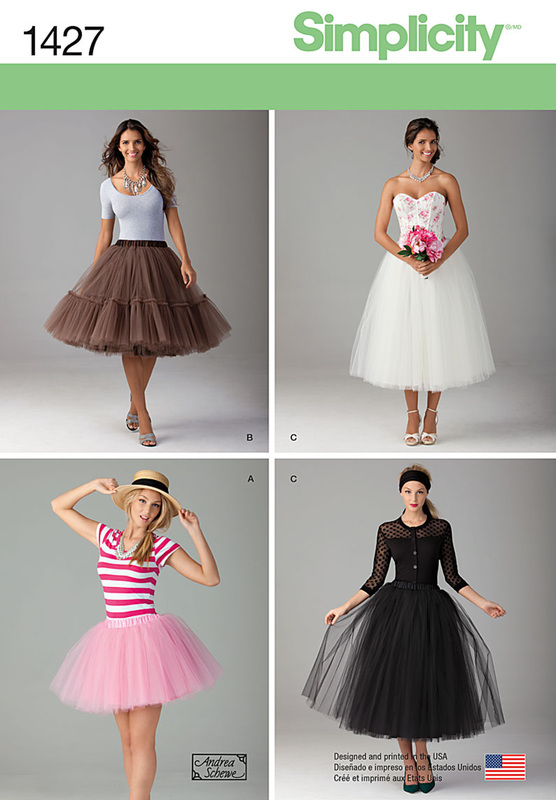
Simplicity 1427  - Simplicity hasn't released any steampunk patterns for a while but this one might be of interest.  Although a tulle skirt sounds simple enough, it can be hard to get just the right look and shape.  From reading the designer's blog, it seems these are more complicated than they look.   These would be an interesting item to add to a steampunk look, especially since they could double as under-skirt supports if needed.


Finally, both Simplicity and McCall's have now released their takes on some Game of Thrones costumes.  Although I wouldn't consider them steampunk as-is, they may be of interest for someone looking for something different.

Monday, April 7, 2014

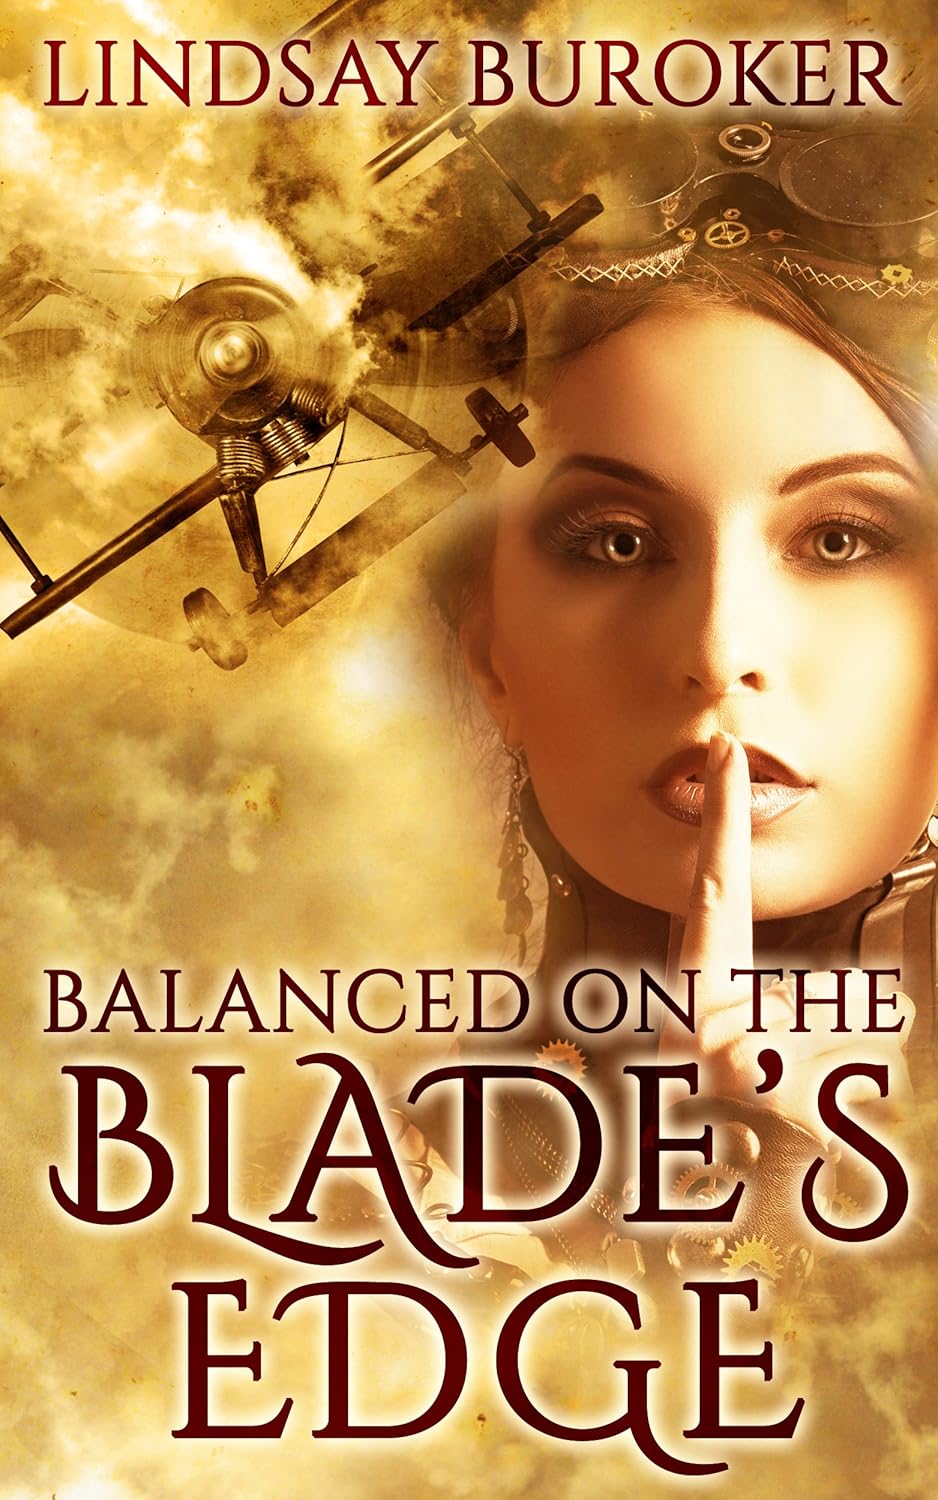
Book Review: Balanced on the Blade's Edge by Lindsey Buroker

Balanced on the Blade's Edge is a new steampunk romance novel by Lindsey Buroker, who happens to be my personal favorite indie author.  I adore her Emperor's Edge series (you can read the first book for FREE) so when I heard she was publishing a steampunk romance, I knew I had to check it out.

Like the Emperor's Edge series, this book is set in a fantasy world with steampunk elements.  The two main characters are both well developed and the narration splits between them.  Sardelle is a mage from a dead culture who was wiped off the map 300 years before the present time.  She was saved but trapped in stasis buried under tons of rock in her people's mountain home.  The approach of miners finally revives her, and she finds everything she has known is gone, replaced by the culture of those who killed her people.  What's more, she's now trapped in a prison camp among people who will kill her if they suspect her of witchcraft.

Colonel Ridge Zirklander has just been assigned to take over command of this prison mine, as punishment for finally mouthing off to the wrong diplomat.  He's a pilot and a national hero in the ongoing war to defend Iskandia from magic using conquerors.  He's appalled at the conditions he finds in the mountain, and puzzled by the mysterious woman who appeared from nowhere right before he arrived.  He knows she isn't what she claims, but is she a dangerous spy or harmless academic?

The majority of the book centers around the interactions of these two characters who are inclined to really like one another, despite the fact that they have good reasons not to trust one another and conflicting agendas.  As a romance, I found it very enjoyable although not as compelling as some of my very favorites in the genre.  And for those who are bothered by explicit content, there isn't much here at all.

The book is fairly light on steampunk elements, though the universe is certainly very steampunk friendly.  There honestly isn't as much description of either the technology or the world outside the prison as I would like, so I don't feel I can really say how steampunk they really are.  There is a lot of focus on the magic of this world and how it works and that is fascinating and pretty original.  There are airships and pilots and the military, so I guess that's enough.

Overall my takeaway from this book is that I really like the characters and think there's good potential for the world with some more development.  I hope this becomes a series.  It was a quick read, but a very enjoyable one.  For $2.99, the current price, it's hard to go wrong.  But I don't think it quite equals the author's work in Emperor's Edge or the Encrypted books.  And I was hoping for more steampunk in a book called explicitly a steampunk romance.


Friday, April 4, 2014

Friday Finds: Steampunk'd Characters

In honor of my new project, let's see some other steampunk versions of existing characters.


Steampunk Ariel


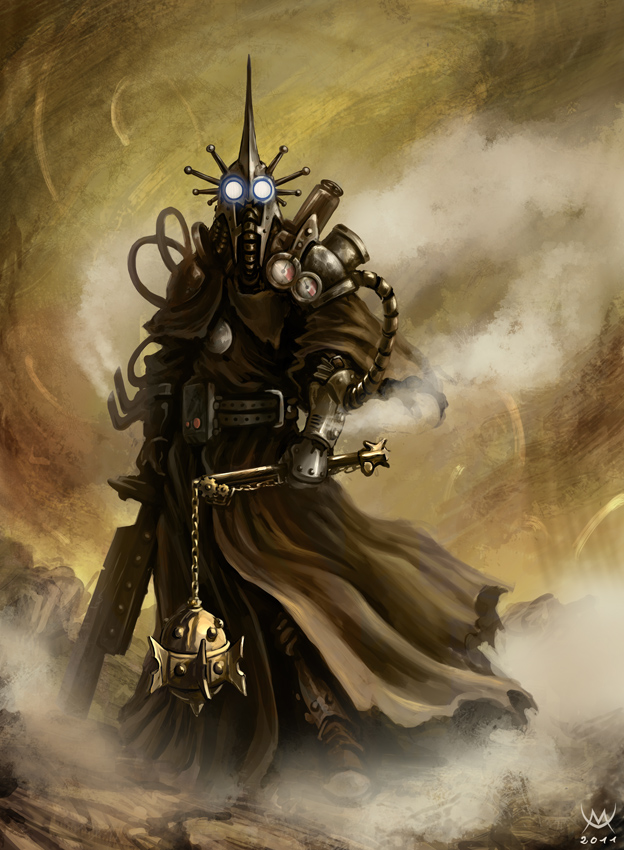
Steampunk Witch King of Angmar


Steampunk Shell from Portal


Steampunk Batgirl Cover  (19 other steampunk DC covers at the link.)


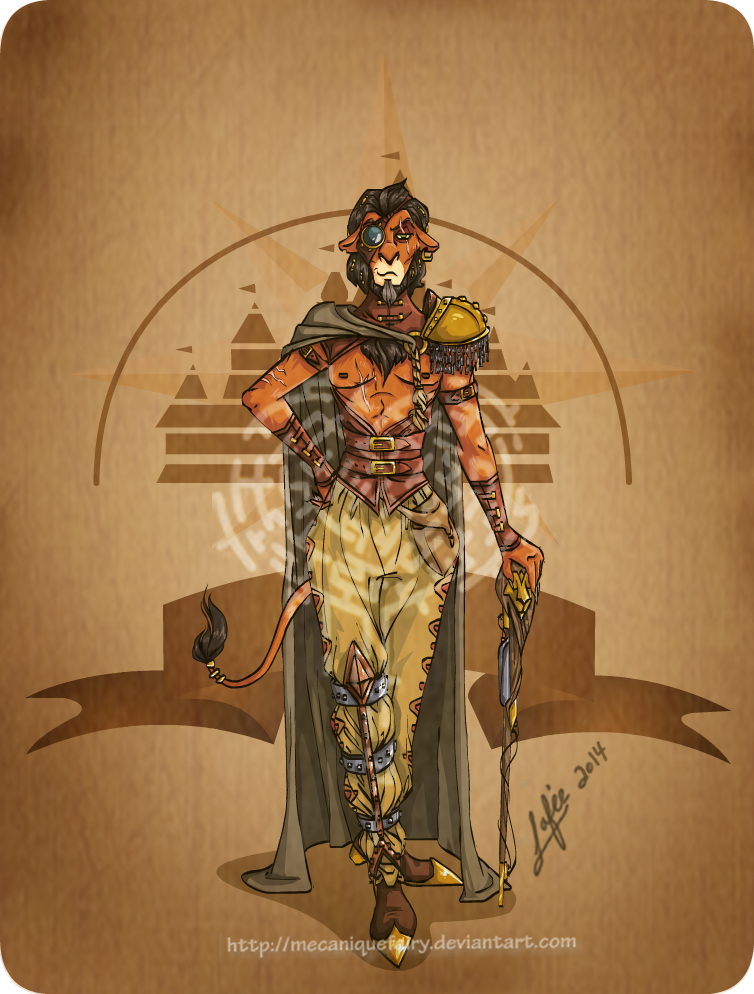
Finally, one more by Mechanique Fairy, who inspired me with her Darkwing Duck.  Steampunk Scar

Wednesday, April 2, 2014

Femme Steampunk Darkwing Duck Corset

So I actually started work on patterning this corset for myself probably almost a year ago.  It went through several mock-ups and I finalized the pattern and decided on the fabrics and lace last August or so.   Only after that did I really formulated The Plan for the Darkwing outfit and realized I conveniently needed a purple corset for a base.

To be honest, not much of this corset is going to show under the coat (I am continuing to develop the very rough drape).  Just the bust area.  That's ok, because the lace doesn't really go with the rest of the costume.

I made this corset mostly to show off both my figure (cause if you got the hips...) and my improving corset skills.  I was mostly wildly successful.   The only thing I'm unhappy with is the exact fit of the bust.  I was trying to account for my LARGE asymmetry  (one of my breasts is easily a cup size bigger than the other), but the fact that I pattern many months from actually making the corset means I made a few mistakes and by the time I was putting everything together I saw what I could have done better, but it was too late to totally redo.  But that's nit-picky.  (One day I MAY make a perfect corset.  That is not this day.)


Technical stuff: The corset is made from a self-drafted pattern that I tweaked and tweaked to get the shape I wanted.  I wanted something that was full-coverage enough that I could wear it for formal events.  I also wanted to get the maximum dramatic effect on the hipspring, because I COULD and I didn't feel any of my corsets had really shown my hipspring off fully.   Also I wanted to get a good side-seam symmetrical overbust pattern.  That means that the side seam runs directly down the middle of my side, with most of the hip curve in that seam.  It makes the hip more dramatic but it's more difficult to construct smoothly.

The corset is double boned with all 1/4" spiral steel except at the grommets.  The busk is an extra wide (and extra long) busk which I've found works best with my curvy figure.  The fashion fabric is dupioni silk backed with fusible woven interfacing with appliqued lace along the entire bottom. I love how easy the silk was to work with after interfacing.  Always doing that from now on. Strength fabric is cotton duck (cause I'm broke) and the floating lining is twill.  The bones are encased in the pressed open seam allowance of the top two layers.  This is a method I don't really like because it's not as strong as a welt seam but I double stitched each seam so hopefully it holds.  The double boning is nice, but I do still generally prefer having a bone in the middle of the panel.  Some of these panels are very skinny in one place and very wide in another and that means I couldn't have a bone running down the middle.

The light purple works fabulously, but it was initially an accident because I ran out of the dark purple silk.  My pattern pieces were so weird in shape that I didn't have enough room to cut the whole corset from my 1/2 yard piece of silk remnant.  So I used a complementing color and it all worked like I planned it that way.  I'm considering using bias of the light purple around the edges of the coat to match.  That probably will come down to time.

I have no pictures of the back because those pictures mysteriously disappeared from the camera.  Which means I don't have a very good idea what the back looks like on, either.  I have no idea how much of a waist reduction this is because I NEVER remember to measure.  I should be able to close it further once it's seasoned/broken in.  But it's really comfortable even though it's a pretty good cinch.

One of the complications for the rest of the costume is that I wasn't thinking of making a whole matching outfit when I chose these colors/fabrics.  I won't be able to actually match this purple, since I can't afford to make the whole costume in dupioni and the dye lots wouldn't match anyway.  So I have to find the right colors of purple to go nicely with this while still playing the right role in the Darkwing costume.  I think I have the cape fabric sorted, but I'm still waiting on swatches for the coat.  Cross your fingers.  (Also notice how the one photo makes the purple look way redder.  Yes, it's retouched a bit, but the color really does shift from blue-purple to red-purple depending on the light.  Which means it will probably clash no matter what I do. )


ETA: For the curious, this is a 4 inch reduction from my natural waist.  I was surprised that at least for now the waist measurement is the same as my usual corseted waist.  My measurements in this are 45-32-48.


>