

Quite a while ago I noticed a trend in boot designs. Some steampunk-looking boots included a cuff buckled around the ankle of the boot. That would be easy to DIY, I thought. And I've finally put together a tutorial on it. This would be a great way to take some everyday boots and give them a steamy look, and it's infinitely customize-able.
So this tutorial will show you how to sew your own ankle cuffs to steam up your boots. You could also make these out of thick leather using rivets to hold everything together if you have basic leatherworking tools and skills. But for this one, we'll be using a sewing machine.
Materials:
Garment weight leather scraps, or faux leather or vinyl
4 small buckles (mine are 3/4" wide)
Adornments (optional)
 |
| An example. |
Tools:
Ruler
Scissors or rotary cutter
Sewing Machine
Hole punch/leather punch

1. Measure around the ankle of the boots over which you intend to wear the cuff. If you want to use these with multiple pairs, make sure you measure the largest boots. My measurement was just about 12", so I'll be basing my sizing on that.


3. Pin two rectangles together, right sides together, and stitch three sides closed, using a 1/4" seam allowance (or whatever allowance you allowed for when making your rectangles.) Leave one of the short sides open so you can turn it right side out.

4. If needed, trim the seam allowances and clip the corners. Turn right side out and press, being careful not to burn your fabric. Test your faux leather with your iron on a scrap first, and consider using a pressing cloth to keep it from melting.
Turn the unstitched end in and press that into place.

5. Top-stitch the open end closed, continuing around the entire rectangle to make a line of top-stitching. You can use contrasting colored thread for this if you wish it to pop. My stitching turned out very messy on this faux suede, so I didn't. I also opted to do a second line of top-stitching. Whether you do one or two lines is up to you. You could even use a zigzag or decorative stitch if you want.

6. Now it's time for the straps. You should cut strips of material about 1/4" wider than your buckles. Mine are 3/4", so my strips are 1" wide. For the length you will need to make them long enough to overlap when they buckle and long enough to stitch to the back of your rectangles. You can have them buckle at the back of the boot or on the side. For decorative purposes, I wanted my buckles on the side of the boot. So I made one strip 4" long (the side with the buckle) and one 8" long. You will need 8 strips of each length.

7. Stitch the strips together into tubes, right side together, using a very small 1/8" hem. To turn the tubes right side out, I used a Dritz Quick Turn
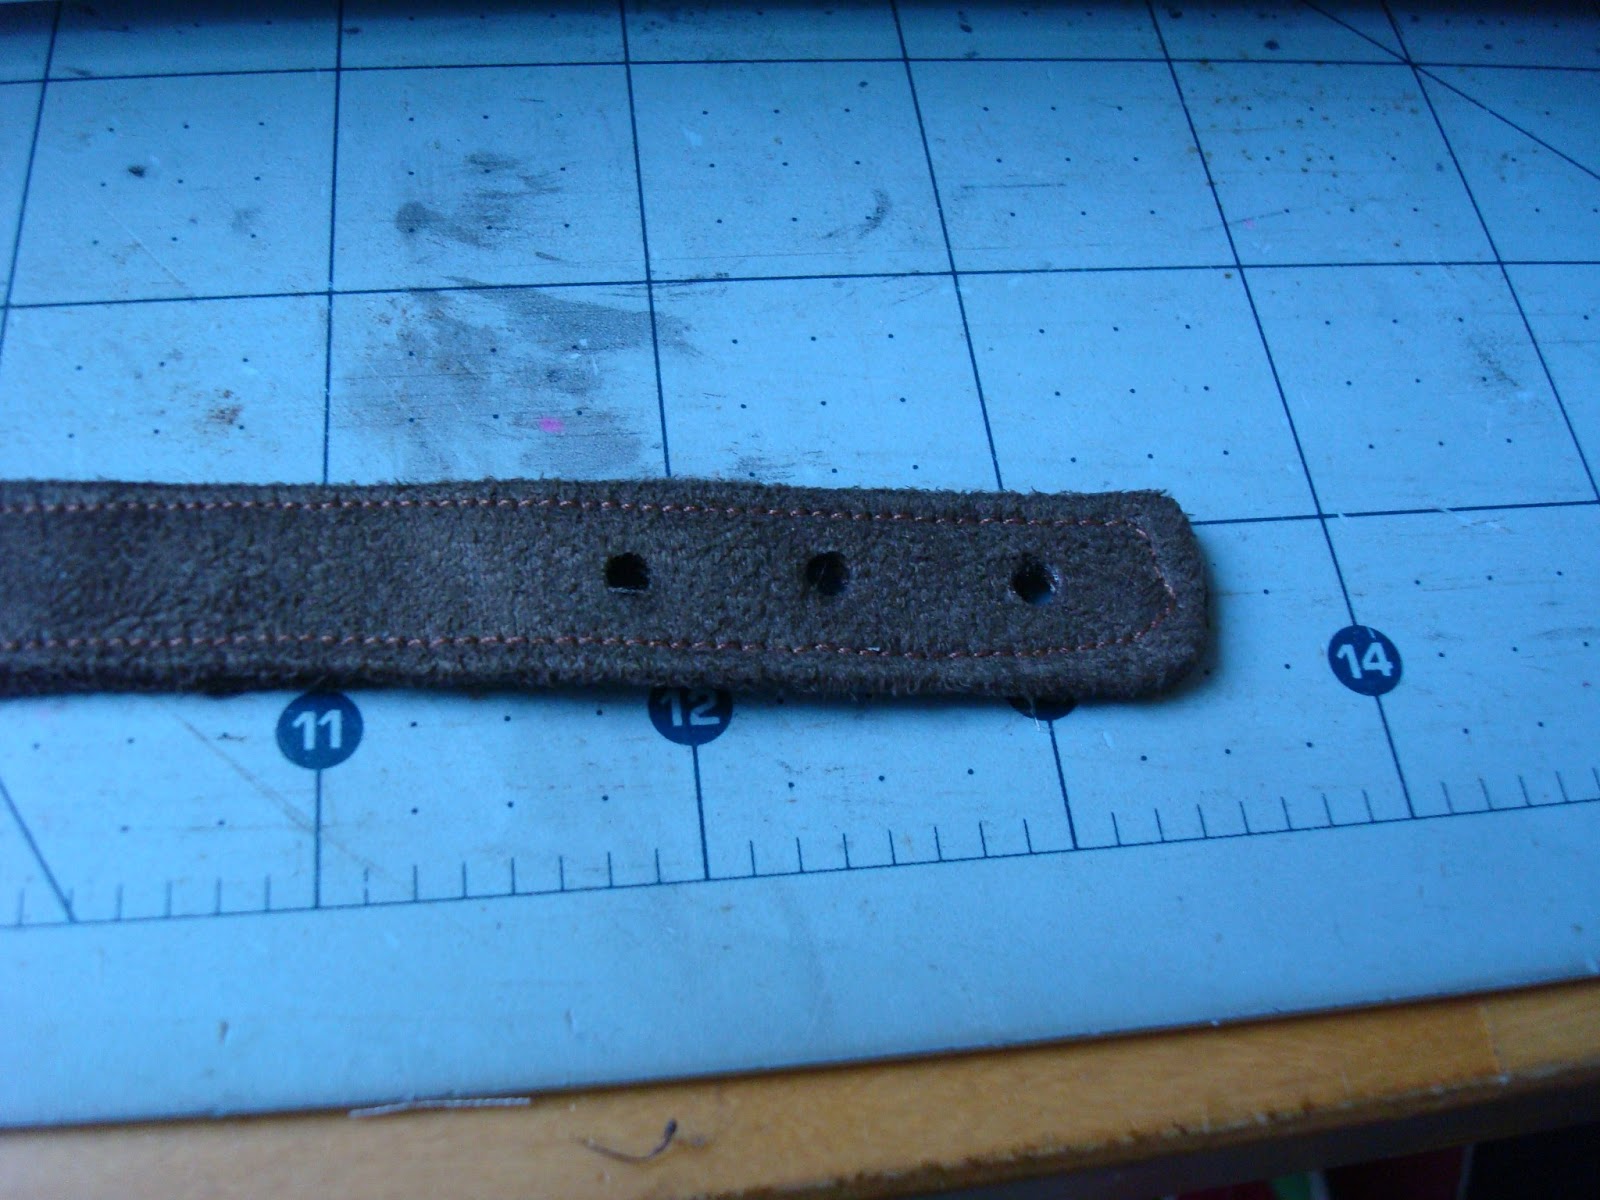
8. At the end of the long strap, punch several holes for your buckle. It's easiest to use a rotary leather punch for this.

9. Attach the buckle to the shorter strap by winding the strap through the buckle, making a hole for the post, and stitching the end down.

10. Finally, attach your straps to the rectangle by placing it on the back and top stitching over your previous lines of stitching.
Attach two buckle straps to one side of each rectangle and two long straps to the other side.
Congratulations, you now have a boot/ankle cuff!

You can stop there if you want and wear the cuff plain. Or you can add whatever adornments you desire to it. You can add any kind of jewelry finding, metal bits, clock parts, chains, buttons or whatever to it with a few stitches. You could even add embroidered patches. I chose to hand-stitch some filigree bits that I had lying around.


Very cool!
ReplyDeleteQuick question - where do you get all of your filigree pieces? I've had some luck with Vintaj brand, but am on the lookout for other brands/suppliers.
I believe these are probably Vintaj. They're from Michael's, at least. But other than these in particular, I usually get filigree from various etsy sellers. Most recently I ordered a bunch from The Despina Collection.
Delete